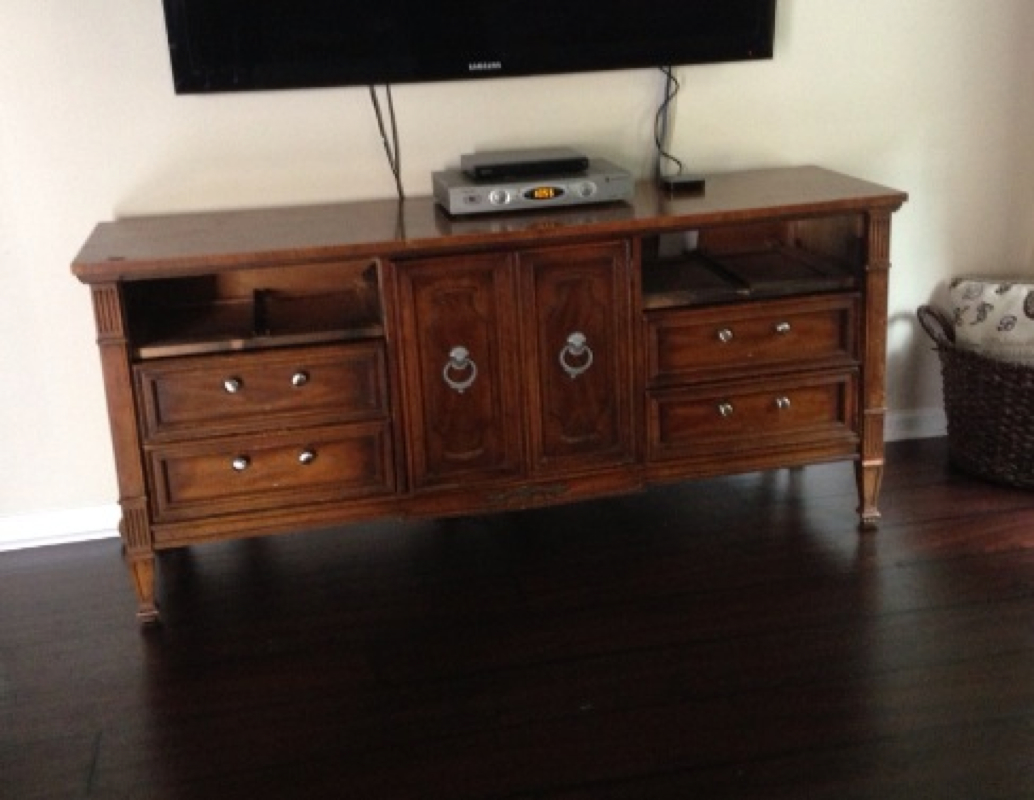
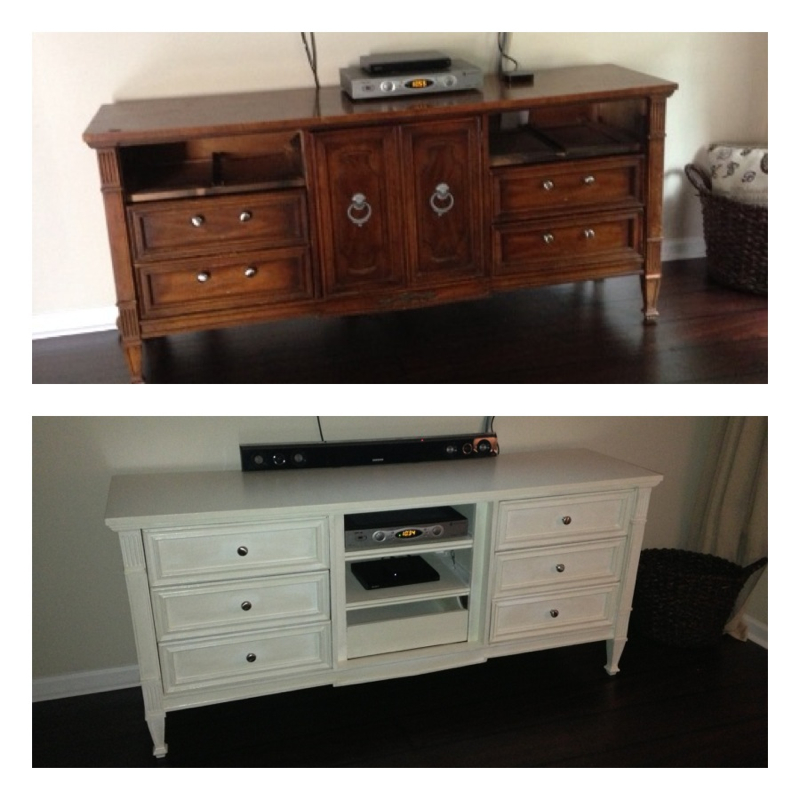
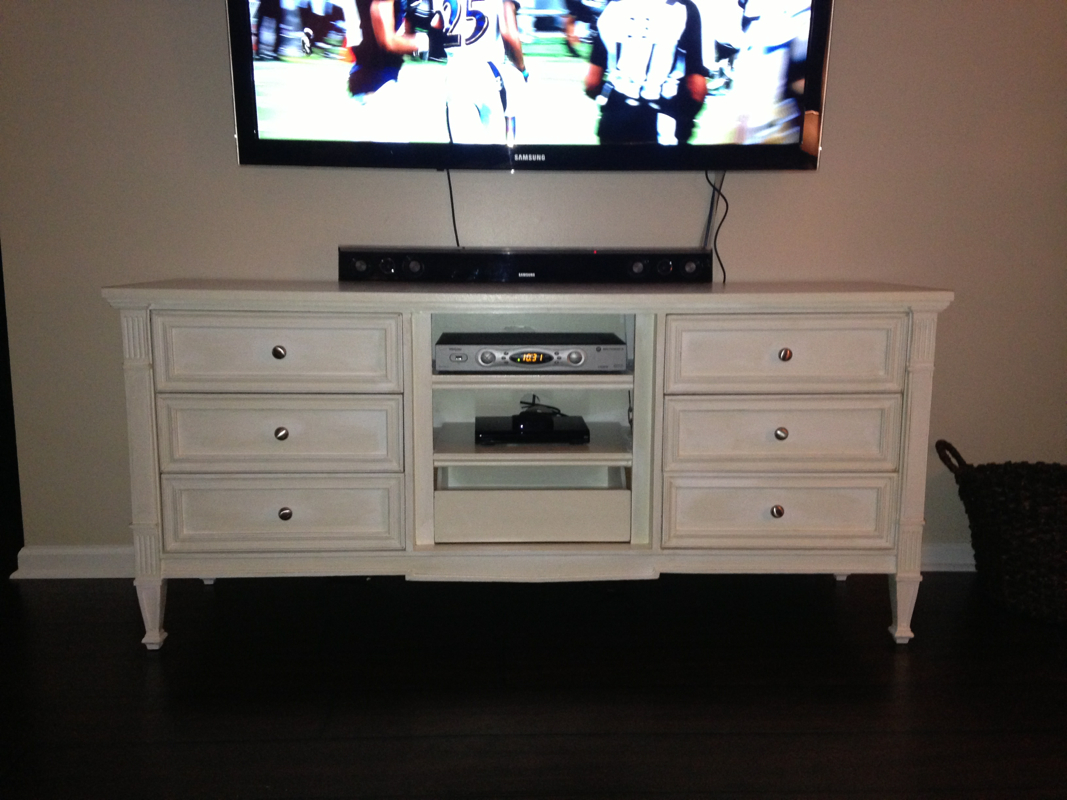
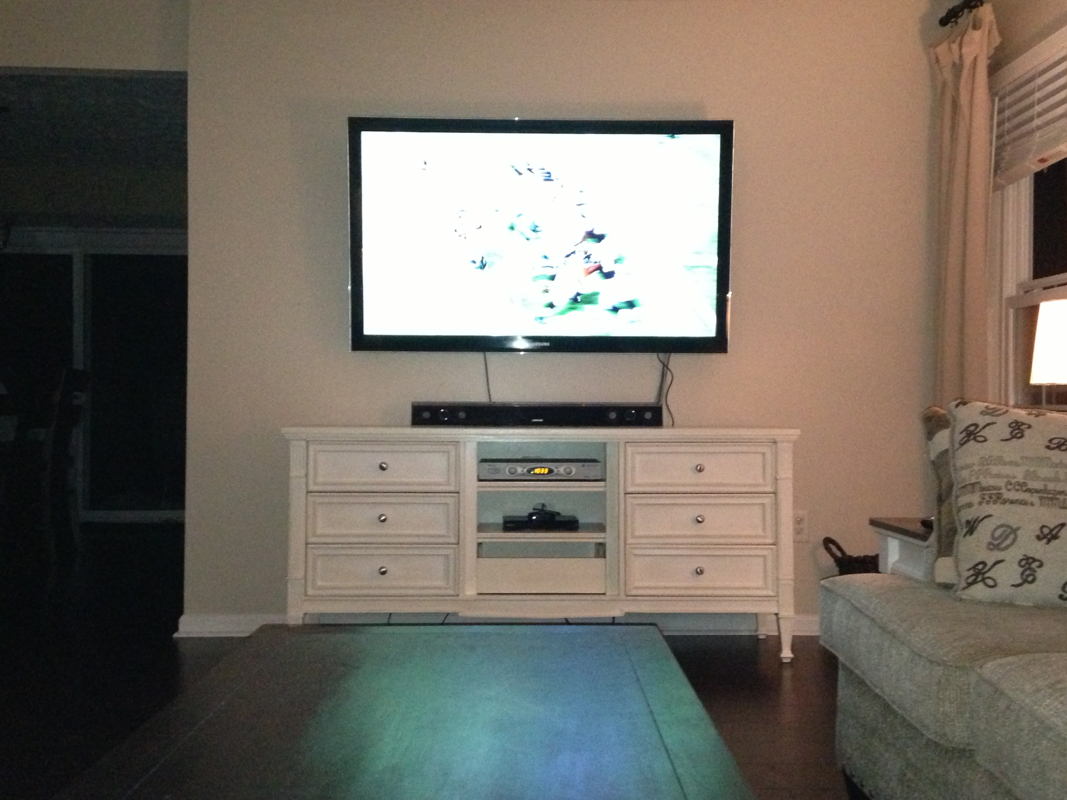
It all started back when my oldest was about 3 months old. The hubs came home one day and was like "Hey babe, can you help me unload something from my truck?". The look on his face said it all, he bought something big and he was really excited about it. Uh-oh. As we're walking out to the car, he says "Now before you get mad, just know I bought this for Ella" (our daughter, who let me reiterate was 3 months old at the time!) He opens the truck and sitting in the back seat was this HUGE tv. I mean huge. Ummm...ok, she needs to watch Mickey in real people size?!?! Anyways, it's been in our living room ever since. We recently hung it on the wall and then later rehung it again, which I recommend asking a fellow male friend to help! That thing is heavy!! We were using one of those ikea hemnes sofa tables under it which was working out ok, but my kids thought the baskets I had tucked in there were toys and would pull them out 3959527 times a day, and it was getting old. Plus, we decided to redecorate the living room and that piece just didn't fit in anymore. So I sold it on craigslist, and was soon on the hunt for something perfect to put under it. I originally tried the use a few ikea billy bookcases under it, but with a tv that size, those things were just too big. Also. I already knew that wouldn't work because I wouldn't be able to put anything on the shelves, because of my little munchkins. So, I moved those bookshelves in the basement (which worked out perfectly in the playroom) and set the cable box on a little TV tray...and there it sat. And sat. And sat. Well, you get the picture. It was hideous but I just couldn't find the perfect tv console to use that wasn't under $1,000. Ummm, no thanks. Then one day as I was browsing craigslist (ps-in case you didn't know, I'm a craigslist addict! Always on there looking for stuff), I came across this beauty. She was perfect. I was looking for something long because the tv from bottom corner to bottom corner is like 65" across, and I wanted something that extended beyond the tv. It had drawers which was good, I'm hoping that deters the kids from pulling everything out of it. (Wishful thinking, we all know what's going to happen here), had lots of storage space, was solid wood, matched the lines of all the other tables in the room, and get this was only $40!! Sold! I loaded up the boy one day when the hubs and the girl were napping and headed off to pick it up. Oh, the fun. He was pretty surprised when he woke up that day. I pulled one back on him..."Hey Bob, now I need your help unloading something out if my car!" ;-)
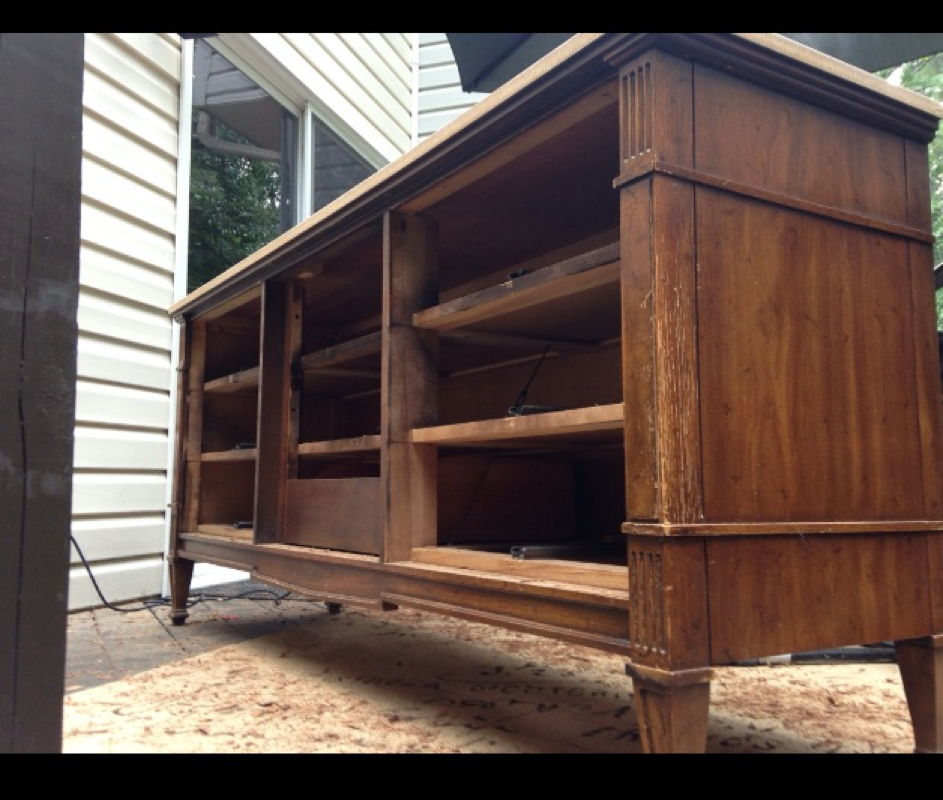
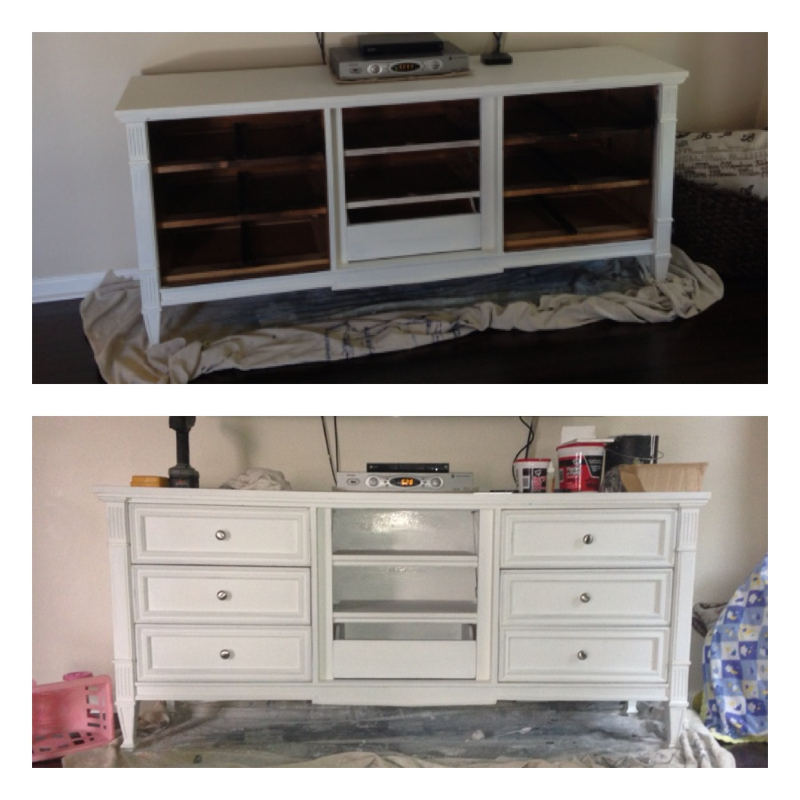
Not soon after I brought her home, I got to work. Shew...anyone else ever get really excited about a project, but then once you start you think to yourself "what was I thinking?!?! Ahhh"! I won't ever admit that to the hubs though, so shhhhh! I started by removing the knobs, and filling the holes in. Then, I sanded it down the best I could, then started to work. I used a primer just on the top, and for the rest I just mixed up some white paint I had on hand with some plaster of Paris (love this stuff! So easy) and started painted. I got most of it done in a few days at night when the kids went to bed. Then...I encountered a problem. Don't know how I missed it before, but if you look at the drawers, you'll notice they all have trim around them. Well all of them but ONE! This dumb drawer only had 3 peices of trim! Ahhh...what to do now. So I started hunting. This dresser is pretty old so I was afraid I wouldn't be able to find trim that matched up perfectly. I looked at Home Depot, Lowes, Restore at trim and old picture frames)...nothing. Sigh...but then while looking again at Home Depot, I found some that sort of matched. Good enough for me. Brought her home and started sawing. I used a miter box for the first time, and although I did mess up once, overall it wasn't too hard to use. I even cut two peices out for the trim on the shelves too. (The hubs just cut some pressed wood down to size to fit in the drawer slots for shelves) Then I glued the trim on with wood glue, and finished painting this beast. Next, I drilled new holes for just single knobs (originally there were 2 in each drawer). Then I used a sanding block to lightly distress it, mostly around the corners and places where it would naturally wear. Couple coats of poly on top, cut 2 holes in the back for cords, and viola...the perfect dresser turned TV stand. And I bet you can't even tell which drawers has the 1 piece of mismatched trim :) I'm already on the hunt for the perfect things to sit on top, now that I have some shelves for the cable box and DVD player! I'm also looking forward to getting a chance to decorate the top with each holiday and season! Yayyyy it's going to look so cute! Finally...done. Woohoo! And the best part...the grand total for everything was only about $75!! That's a win in my book!
 RSS Feed